Contents
Overview
Paylink allows merchants to send a secure Hosted Payment Page (HPP) directly to the customer via email or sms.
With support for 3D Secure the HPP provides merchants additional protection against chargebacks instead of processing MOTO (Mail Order Telephone Order) or Manual payments, reducing the risks and cost of accepting credit card payments.
Paylink is available in a range of Windcave solutions, for more information about how to use Paylink please select your desired solution below:
Paylink via Payline®
Before following the below steps, merchants should first log in to their Paylink enabled Payline® user, you can log in to Payline® by navigating to https://sec.windcave.com/pxmi3/logon and entering your username and password.
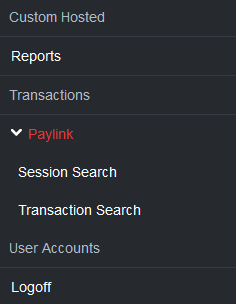
1. Navigate to Transaction -> Paylink using the navigation menu
2. Fill in all applicable transaction details
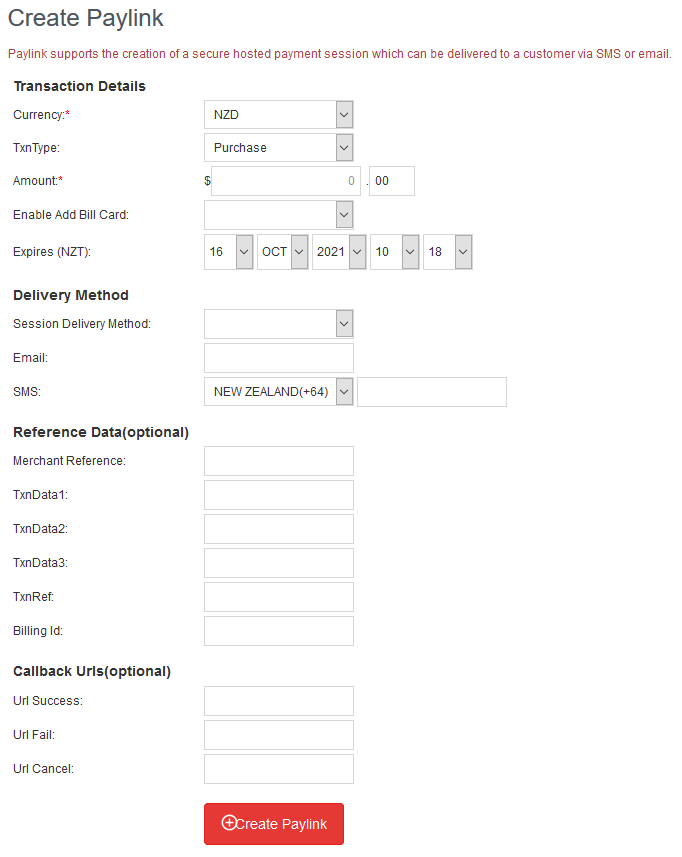
| Field Name | Description |
|---|---|
| Currency | Currency the payment will be processed in, available options will vary per acquirer and setup. |
| TxnType | The type of transaction to be used:
|
| Amount | The desired amount to charge the customer. |
| Enable Add Bill Card | Indicates if Windcave should generate a unique token card used to complete payment or not, tokens are used for rebilling customers at a later date. See Stored Card Functionality for more information. |
| Expires | Configures the date when the Paylink session will expire, once a session has expired it can no longer be used to process payment. |
| Session Delivery Method | Determines how the Paylink session should be delivered to the customer:
|
| Optional customer email address to be stored against transaction, this is required if session delivery method is set to “Email”. | |
| SMS | Optional customer SMS number to be stored against transaction, this is required if session delivery method is set to “SMS”. |
| Merchant Reference | Free text field. Enter any meaningful reference. Commonly used for transaction tracking and reconciliation. |
| TxnData1/2/3 | The TxnData fields are free text fields that can be used to store information against a transaction. |
| TxnRef | A unique, merchant application generated value that uniquely identifies the transaction. |
| Billing Id | Optional merchant nominated unique token Id, should only be populated if merchant requires custom token Id |
| URL Success/Fail/Cancel | Optional call back URLs for merchants wanting to provide a call back to their backend of payment status. |
3. Click Create Paylink to generate the Paylink session
4. Confirmation of session creation will be displayed on screen:
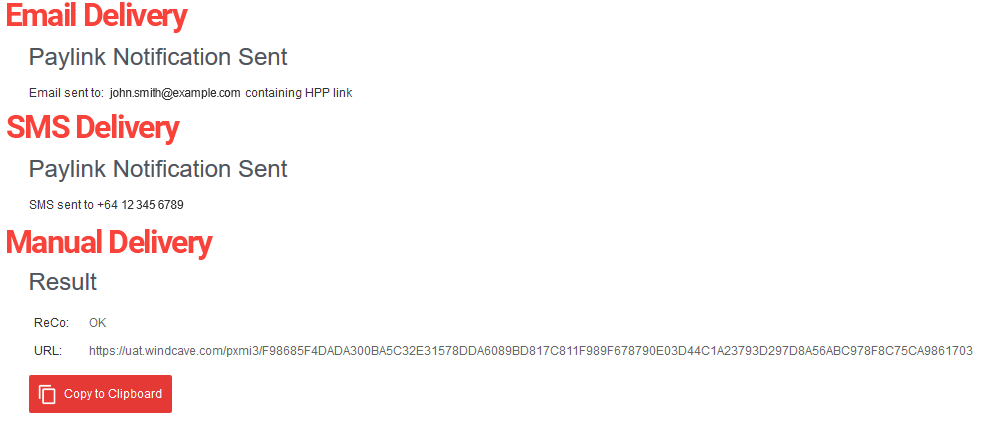
5. The customer will be sent a HPP link via email, SMS or manual delivery, see Customer Experience for further details
Stored Card Functionality
Stored card functionality allows merchants to generate a secure token of the card used for payment during the Paylink session, with the cardholder's permission this token can then be used at a later date to process future one off or recurring payments from the customer.
Paylink allows merchants to generate the token but rebilling functionality is handled through the Payline portal and or other Windcave API's.
Supported Payment Methods
Not all payment methods support stored card functionality, by default any non-supported payment methods will not be available for selection on the HPP when the Enable Bill Card field is set to "Yes".
Below are the payment methods that currently support stored card functionality:
- card
- visacheckout
Windcave can enable non supported payment methods to be available on the HPP even if Enable Bill Card is set to "Yes", however these payment methods will NOT return a stored card token value.
Using Stored Card Functionality
When creating the Paylink session merchants will have the option to "Enable Bill Card", setting this field to "Yes" will enable Stored Card functionality for the Paylink session and reveal additional fields to be completed.
Once enabled a Stored Card Indicator field will appear, this field is used to indicate the reason a card is being stored and is required to meet mandates from the major card schemes.
Below are the available options and details about them including any additional required fields:
| storedCardIndicator | Description | Additional Requirements |
|---|---|---|
| Credential On File Initial | Cardholder will save card and for future orders the cardholder selects to reuse the saved card for the one-off payment. | |
| Unscheduled Credential On File Initial | Cardholder will save their card and for future order based on an event (such as top-up) the merchant will reuse the saved card on behalf of the cardholder for the one-off payment. | |
| Recurring Fixed Initial | Cardholder will save their card and merchant will reuse the saved card on behalf of cardholder for the subscribed recurring payments of fixed amount e.g., monthly account fee for streaming service | Merchants must also include the below fields under the Additional Recurring Information section:
|
| Recurring Variable Initial | Cardholder will save their card and merchant will reuse the saved card on behalf of cardholder for the subscribed recurring payments of variable amount e.g., recurring payment for power bill where amount due may vary | Merchants must also include the below fields under the Additional Recurring Information section:
|
| Installment Initial | Cardholder will save their card and merchant will reuse the saved card on behalf of cardholder for the installment payments. | Merchants must also include the below fields under the Additional Installment Information section:
|
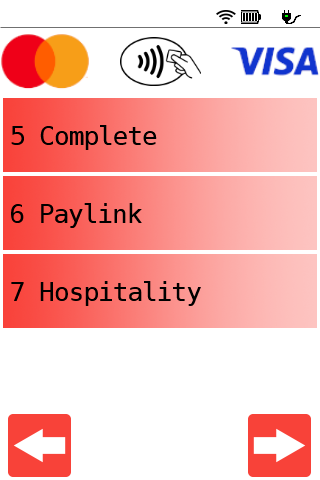
Paylink via Terminal
From the Windcave payment terminal follow the below instructions. Please note the user interface may vary slightly between terminal types:
1. Press Function to open the menu
2. Navigate to Payment → Paylink
Note for Ingenico terminals select the Paylink option directly from the main menu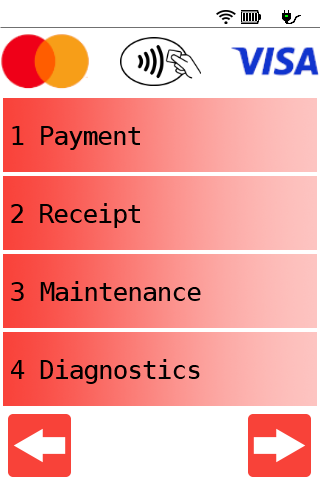
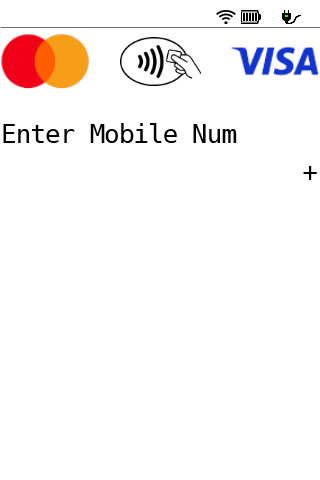
3. Follow the onscreen prompts to enter the amount and customers mobile phone number

4. PAYLINK SENT will be displayed if the Windcave host receives the Paylink request
Note for Ingenico terminals Approved will be displayed instead
5. The customer will be sent a HPP link via SMS, see Customer Experience for further details
Paylink via API
Merchants with REST API credentials can implement Paylink via API, for further details please refer to the Paylink via API section of the REST User Guide.
Customer Experience
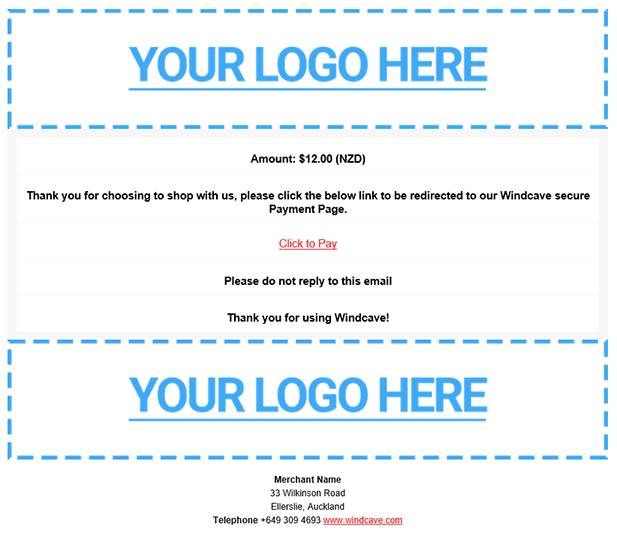
Email Delivery
Below is a basic example of the email notification received by the customer when using the email delivery method:
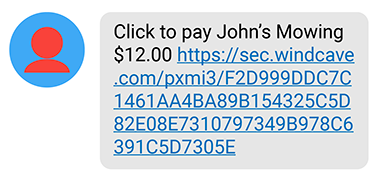
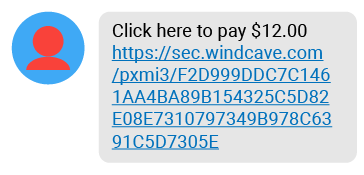
SMS Delivery
Below is a basic example of the SMS notification received by the customer when using the SMS delivery method:
Submitting Payment
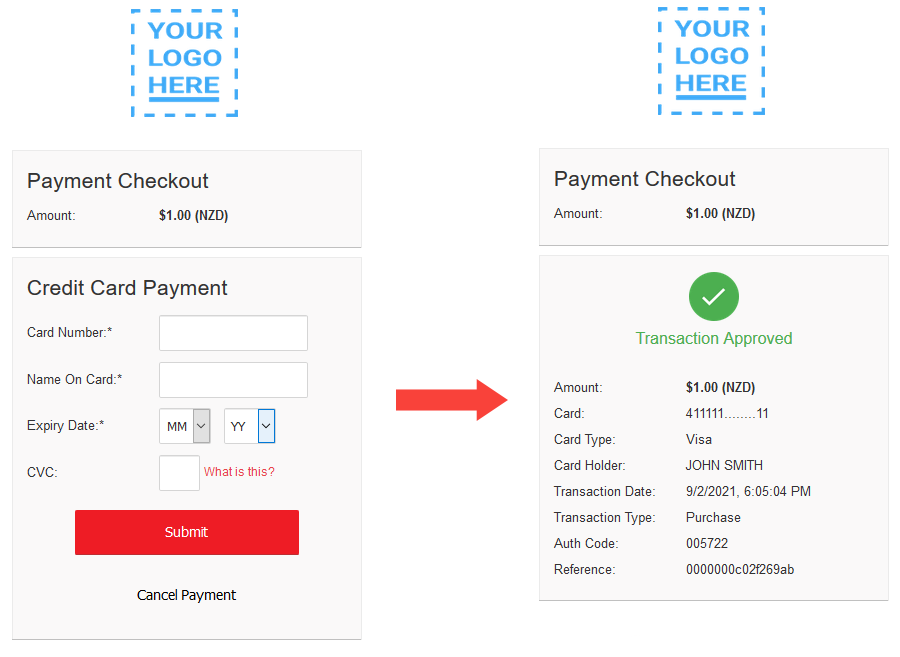
Clicking the payment link will open the Windcave Hosted Payment Page on the customers device, here the customer can securely input and submit their payment information.
Below is an example of a Windcave Hosted Payment Page and the payment result page once payment has been submitted:
Cardholder Transaction Receipt
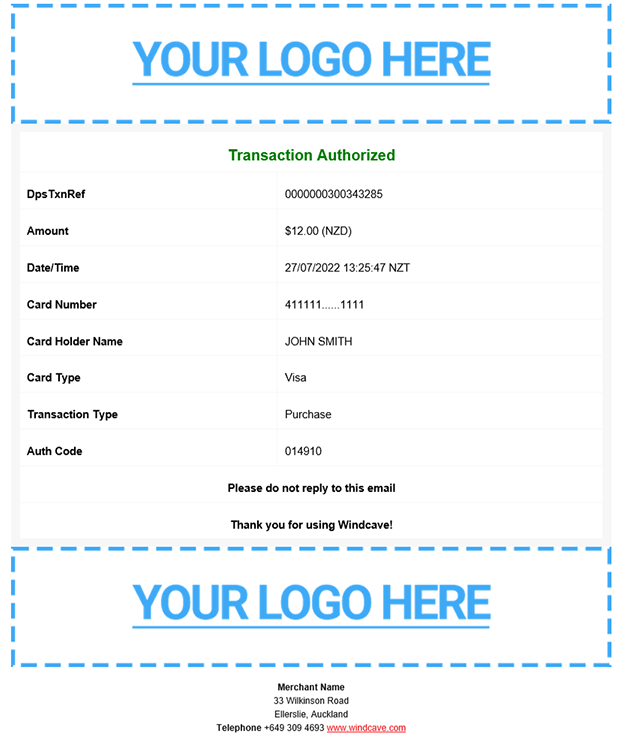
Paylink users can be configured to send a transaction receipt to a Cardholders email once payment has been completed.
Below is an example of a Cardholder Transaction Receipt email:
Paylink Session Search
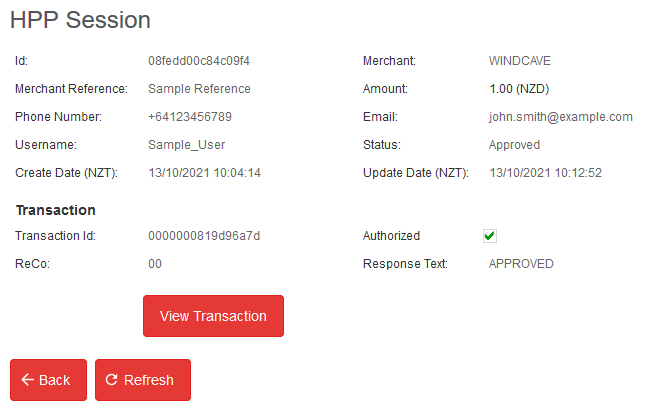
Once a Paylink session has been created merchants can track its progress by navigating to Transactions -> Session Search page from their Payline® login.
Here merchants can input the desired search criteria then click Search, all applicable sessions will be displayed in the table below.
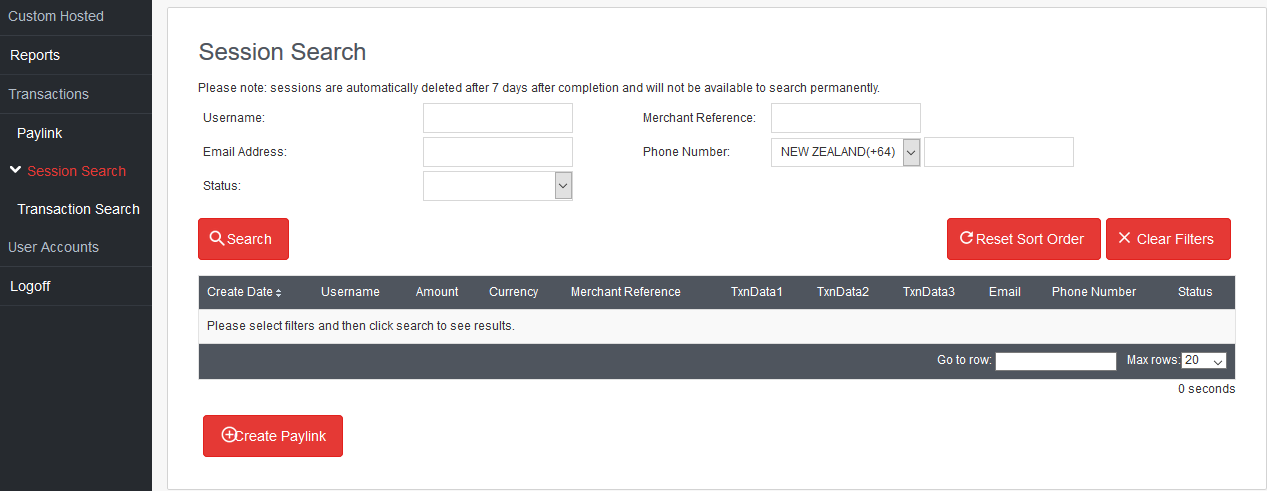
Selecting a session from the list available will display additional details about the Paylink session.
Customization
HPP Customization
From Payline® merchants can navigate to Custom Hosted -> HPP Customization, here merchants can:
- Customize the look and feel of their Hosted Payment Page
- Customize the details contained on the Cardholder Receipt
- Preview any changes made
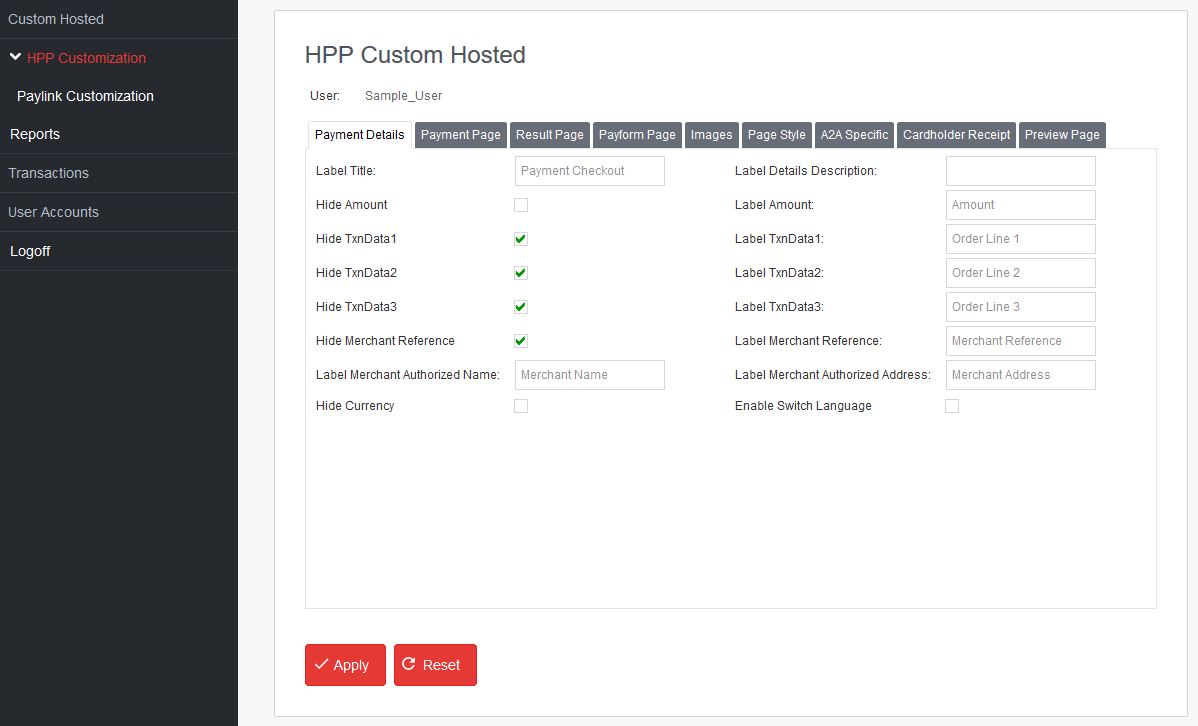
Merchants can apply changes by pressing the Apply button at the bottom of the page, once applied changes can be previewed by selecting the Preview button on the Preview Page tab.
Please note changes applied will not be visible to card holders until after a Windcave staff member has applied the changes live.
To request your changes are made live please email [email protected] with your username and advise that you would like to apply your custom hosted settings live.
Paylink Email Customization
To customize the content of the Paylink email notification merchants simply need to navigate to the Custom Hosted -> Paylink Customization page once logged into Payline®, then select the Email tab at the top of the page to edit Email content.
Here merchants can control what options are displayed in the email body, and by clicking the Label Customization button input a custom email Subject, Title, Instruction Text, and Link Text.
The below Label Customization fields are used to control the Paylink email customization:
| Field | Default Value | Description |
|---|---|---|
| Paylink Email Instruction Text | Blank | Sets the instructional text to guide customers to use the payment link. |
| Paylink Email Link Text | Click here to pay | Sets the text shown for the Paylink link. |
| Paylink Email Subject | Windcave Paylink | Sets the email subject line text. |
| Paylink Email Title | Windcave Paylink | Sets the email title text. |
Once all desired changes have been made, click the Update button to apply the changes.
Paylink SMS Customization
To customize the content of the Paylink SMS notification merchants simply need to navigate to Custom Hosted -> Paylink Customization page once logged into Payline®, then select the SMS tab at the top of the page to edit SMS content.
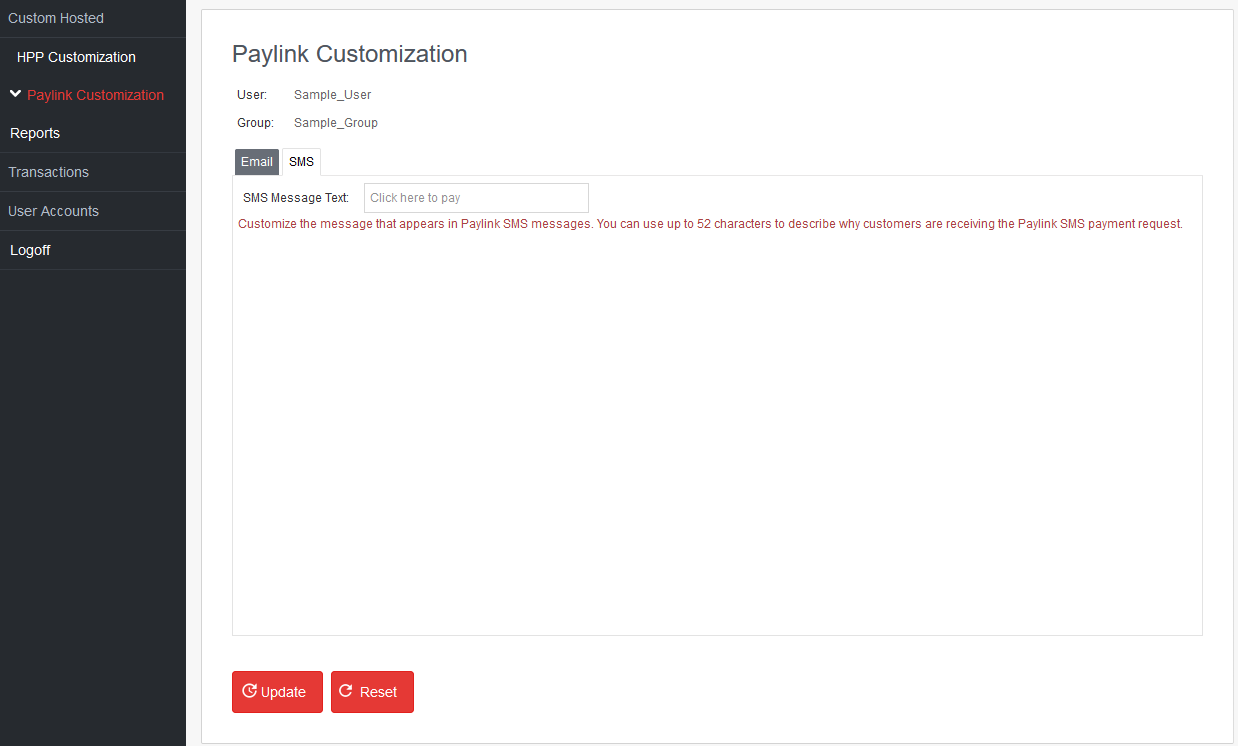
Here merchants can input a custom SMS Message Text up to 52 characters long, the SMS Message Text should instruct the user to click the link and it is recommended to include who the payment is for i.e., “Click the link to pay Sample Merchant”.
Please note the transaction amount and HPP URL will be automatically included in the SMS message, merchants do not need to include this information in the SMS Message Text field.
Below is an example of the SMS message with a custom SMS Message Text of “Click to pay John’s Mowing” configured on the user: